There are no two ways – you need to learn how to install an RV solar panel or cough up and hire an expert to do it for you.
It can be intimidating to do it yourself, especially if you aren’t ready to get into the nitty-gritty of your system. These are our RV solar panel installation tips.
If you’re a dedicated DIYer who is always up for a challenge, read the manufacturer’s instructions with your solar kit first, then follow the installation instructions and advice on this page.
You should be aware that the specifics of your setup may vary based on the type of roof, its size, and the solar kit you use.
RV Solar Panel installation tips and procedures
So, you’ve done your research and bought your panels. What next?! The RV solar panel installation process can be confusing, but once you understand what’s required and follow the steps below, you should be able to manage it.
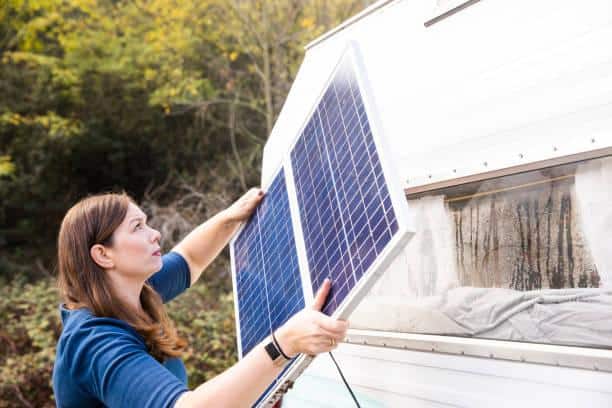
So, how do you put solar panels on your RV? When installing your solar system, the first step is to mount your panels.
- The procedure differs depending on the type of panel. For example, if you have hard panels, you must use screws to secure them to your RV’s roof. If you have flexible panels, you can either use adhesive or screws.
- If you decide to mount your flexible panels with adhesive, be sure your RV’s roof membrane is compatible with the adhesive. To avoid having to use adhesives, most kits come with mounting hardware.
- Once you’ve gathered all of your panels, stiff or flexible, lay them down evenly on your RV’s roof. Make sure everything fits precisely, and once you’re satisfied with how the panels are positioned, note their location. Most RVs do not have flat roofs; instead, they have ribs that run the length of the vehicle.
- Make sure the panels are laid flat, either on the ribs or on the flat roof. Otherwise, you won’t be able to make the proper connection when bonding them. You also don’t want to put your panels near anything that could cast a shadow over them, such as vents or air conditioners.
- It is recommended that you test the solar panels before installing them. Place each one in direct sunlight, then test the voltage at the wires’ ends with a multimeter. This gives you the option of returning them if you discover any flaws.
- After that, fasten the panels to the roof. If installing stiff panels, use the included mounting hardware to secure them to your RV’s roof. You must construct a water-tight seal if you are employing mounting brackets.
- Use a sealant under each bracket to accomplish this. When sealing your RV’s roof, you must know what sealant to use. Check your RV manufacturer’s website or ask a dealer for help if you’re unsure.
- Finally, attach the panel to the roof, careful not to accidentally shoot a stray screw into your panel. This is also the point at which you should drill holes for the cables. It takes a lot of work to keep the edges of cable gland collars clean and painted so they don’t get rusty.
Helpful Hint: Mount the panels on a dry day, then wait 24 hours for the seals and bonding to set before moving the RV from one location to another.
Wiring
Remember that wiring schematic you drew out when you were ready to install it? Arm yourself with it and prepare to connect the solar panels. Most solar panels come with a negative and positive cable meter with a pre-fitted connector that you can use immediately.
- You’ll need to stretch this cable to reach the solar charge controller. One key to good wiring is to keep the cables as short as feasible while minimizing power loss. You’ll also want to leave the cable length intact on the outside of the van so you can easily replace the panel in the future. The additional wiring length can be coiled and taped to the panel’s bottom.
- The most popular and simplest approach is to wire through the refrigerator vent. It prevents you from drilling additional holes in your RV. If your fridge vent is far from the battery compartment, where you’ll likely install the charge controller, you can run the wires through or beside a plumbing pipe as long as any holes you make are sealed.
- Drilling is the last resort. You can drill a new hole anywhere in the RV, but try to drill it near a cabinet so it can be hidden. Use a sealant or a waterproof entry port if possible.
- You can now attach the wires to the hole you’ve drilled and cover it with cable gland collars. It’s tricky to thread the cables through the gland collars from the ground. After you’ve finished threading the cables, double-check that all of the connections are secure, then check the voltage output and connectivity of your solar panel array with a multimeter.
Tip: Remember that series wiring has more voltage than parallel wiring, regardless of whatever wiring scheme you choose. As per your plan, lock the collars in position and go to the next step when you are satisfied with the connections.
The next step is to connect the charge controller.
A common misconception is that this is the most difficult step.
- The first step is finding a mounting place close to your batteries. This will aid in the reduction of line loss. After that, read the manufacturer’s wiring instructions that came with your solar system.
- Certain kits ask you to connect the charge controller to the panel wire before the charge controller to the battery first. At this point, the multimeter will come in handy once more because you’ll need to check the polarity of your cables.
- Next, secure the solar charge controller to the wall or another suitable spot. Connect your controller to the power supply according to the manufacturer’s instructions. Depending on your fuse holder, you may need to crimp termination eyes onto the end of the solar cable.
- If you’re utilizing lithium batteries, you might need a battery temperature monitoring sensor for your battery bank. Add the fuse after the wiring is finished so that power may be delivered to the solar charge controller, which will be configured for your battery. Your solar system is nearly complete at this time.
To finish the installation, close the circuit so that the solar electricity can charge the batteries and make them work.
Then, install the inverter
This is a step that can’t be skipped. You’ll need an inverter to utilize AC equipment in your RV, such as a laptop and a microwave. Because your solar power is DC, you won’t be able to use the appliances directly. The DC power will be converted to AC by the inverter.
- The inverter should be placed close to the RV batteries, away from potentially harmful elements such as corrosive battery fumes or heat. The Dos and Don’ts can be found on the inverter’s label.
- Connect your battery’s positive and negative wires to the inverter, then connect the inverter to your RV electrical system. Keep in mind that the negative side should be connected first. You can now turn on your newly installed solar system. It’s the easiest and most enjoyable part.
- Simply place the fuse in the battery input fuse holder before turning on the battery cut-off switch. If you followed the installation method carefully and completed everything safely, there should be no sparks, flashes, or bangs. Turn off the battery cut-off switch and remove the fuse to discover the fault if there is any flash or spark.
If everything goes well, check the solar charge controller’s display to see if it’s showing the correct sunshine readings for the climate outside.
Final Thoughts
The first step in learning how to install your own RV solar panel is to become familiar with all the necessary resources. The installation process varies depending on the type of solar panels you purchase. The most crucial step is to follow the manufacturer’s directions and have faith in yourself!